COD Zombified, the Call Of Duty Secrets and Maps blog that creates maps for each of the zombie level layouts, along with weapon locations, parts for blue print tables, locations of perks and hidden easter eggs. We have every zombies map from Nacht Der Untoten to Operation Deadbolt! Covers Black Ops Games right up to Call Of Duty Modern Warfare 3 2023 Zombie Maps
here is how to find the blue prints and parts needed to build the new Seismic Wave Generator weapon in Attack of the Radioactive Thing Zombies for Call Of Duty Infinite Warfare. Get your engineering hat on as before we can build the weapon, we need to get the blueprints which will tell us parts we need to build it.
When we find the blueprints, we will take it to a buildable bench and drop the blueprint down onto that table, we will then in turn search for the pars needed to build this zombie ass kicking machine.
I'm feeling blue To find the blueprints, we need to head from the main spawn out the side which has the ice cream parlour on the right. Simply go around the back of the sop and where the back entrance door is, just to the left of it, you will see the blueprint lying on the little curb out the back.
Make your way over to a buildable workbench, there are 4 dotted throughout the map, and drop the blueprint onto it. There is actually a buildable table inside the back of the ice cream parlour back door. Simply go in the back door, turn left and there it is hey presto!
Now you can start collecting the parts that you need to build the Seismic Wave Generator.
Part 1 Location
The first part that you need to find is just behind the building where you got the blueprint. Look around for a coil near where you picked up the Seismic Wave Generator Blueprint, and pick it up to collect it. Now, return to the table and drop it in.
Part 2 Location
The second piece you need to find is an old rod. This item can be found on the red bench on the side of the ice cream parlour. It is silver and sits on the bench beside a newspaper which is hard not to miss. With the rod collected, drop it into the workbench and search for the last part.
Part 3 Location
The third and final piece that you need to complete construction of the Seismic Wave Generator is the capacitor unit. This item can be found in the playground area facing the ice cream parlour. Look for the line of blue port a loo's and it will be on the ground to the furthest port a loo to the right Lets do some damage
Once you have all three parts, interact with the workbench to complete construction of the Seismic Wave Generator. You can use this weapon to blast zombies up into the air and kill them, it’s very useful for clearing out large groups of zombies.
It is also used in the Easter Egg Steps to raise a zombie arm out of the ground on the beach area so that you can pick it up. This is used to build the zombie body. best building it at the start of the play through as it is so easy to build might as well get it out of the way now.
Still unsure how to do it? Check out NGTZombies video below :
here is how to get the awesome CLEAVER melee weapon in Attack of the Radioactive Thing Zombies for Call Of Duty Infinite Warfare. Its not difficult to do, all it will require you is to open your wallet. flash and splash some cash to open several doors that lead you to it, then all you do is pick it up and clean off a pile of shark guts, easy as pie....fish pie.
Lets go for a walk From the main spawn room, head out the exit that leads towards the Power Station. This will be the one that when you exit you will see the ice cream parlour on the right hand side while walking up the hill. Keep walking up the hill and you will see the power station on the right hand side.
Continue past the Power Station, until you see a small yellow truck in the middle of the road. Take a left after this truck and head up the little dirt bath that will take you to the back entrance of the convenience store. The door is initially unopened and will cost a whopping $1500 to open it, daylight robbery if you ask me. Shark fin soup anyone?
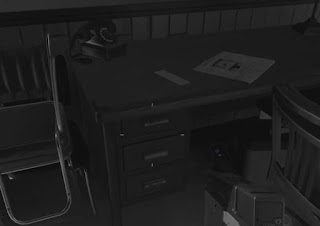
Once the doorway is clear, head through the back store room, on through the office where the safe is containing the nuclear launch codes, past the frozen pigs in the freezer room which contains the zombie torso, until your right at the front of the shop where the till is and selling counter.
Go behind the counter on the preparation area up against the wall on the left, you will see a dead shark with the cleaver stucking out of it. Remove the cleaver from the fish by holding the interact button on it and proceed to melee the hell out of zombies from this point on with it.
Up to about round 10 the cleaver will be one hit kills. This melee weapon will replace anything you currently have as a melee.
The cleaver is needed in order to charge the green vial that Elvira gives you in the TV Studio which you need to charge with Acid Soldiers Blood / Souls by meleeing them with this weapon.
Still not sure? Then check out the following video below from MJPWGaming (the doors are already open in his video:
Step 13 - How many ingredients to make a nuke?...A LOT!
Now from the Radio messages, we know what compound we need to create. When you get your chemical formula, you work from left to right creating compounds and mixing those compounds with others in order to create different elements.
In the above example, start from the right and make the PHENOL first, then to get NITRA it requires mixing Drain Opener with PHENOL to give us Phenosulfonic Acid which we then add Detergent to which gives us the fully compound Tera-Nitra-Phenol.
The compound changes each play through and so do the ingredients so use the lists below to make your life easier.
To find all the ingredients for MAKING these compounds, here is a list of where all the items you need to make these compounds and their spawn locations (From Mr Darlek JD's Video Description):
Silver (Quarters) Use Crowbar on pay phones next to Garage
Copper (Pennies) Use Crowbar on cash register in the Supermarket
Sulphuric Acid (Drain Cleaner) Campsite Bathroom
Ice (Ice) Melee Ice Machine With Crowbar (Supermarket)
Fat (Animal Fat) Use the cleaver on the Left-most hanging chunk of animal Meat
Sodium Bicarbonate (Baking Soda) On middle aisle shelf in market, grey box laying down
Methanol (Racing Fuel) Right Side Of Garage Door On Ground.
Benzene (Motor Oil) Inside Garage Floor, Left Side Of Distillery.
Ethanol (Vodka) On a shelf in the market, to the immediate right of the Fate & Fortune Card dispenser.
Phosphoric Acid (Wheel Cleaner) On a shelf in grocery store
insert+ (Paint) To the immediate left of the Racin’ Stripes machine sitting on the ground in front of a brick wall.
Propene (Insect Repellent) Middle hallway in spawn
Nitric Acid (Detergent) On a shelf in the grocery store
Sodium Chloride? (Table Salt) In the Freezer on the table
Insert (Food Colouring) On a shelf in the grocery aisle
Acetic Acid (Vinegar) On the table to the left as you enter the diner from the spawn side
Nitrates (Plant Food) By quickies outside door to the left on the ground below poster
Insert (Powdered Milk) Inside the Supermarket near the Freezer
Chlorine (Pool Cleaner) Next to the pool
Acetone(Nail polish Remover) In a room at the pool
Here are the mixtures that can come from the radios:
3-methyl-2,4-di-nitrobenzene Dinitro Racing Fuel
3,4-di-nitroxy-methyl-propane Aldehyde Sludge Nail Polish Remover(acetone)
When you find all the items to create your formulas, you need to go to the garage area and place the items on the CHEMICAL MIXING STATION and create each stage in turn.
Now at the mixing station you will have to do a bit of maths using the chemical compound boards and the numbers beside each ingredient on the boards. We will be using the result we got for O earlier on in this Easter egg which was used to multiply M by.
For instance the compound created above uses Wheel Cleaner, Motor Oil and Insect Repellent. We look at the number diamond beside each ingredient and add the top number and the left number together for each ingredient. We then take the number we got for O earlier in the map and subtract this away from the total we get.
We then input this number into the mixing station console. So in this instance from the above picture say we got for O = 9, we add the 3 ingredient values first which is 6 + 15 + 15 which equals 36, then minus 9 from 36 to give us 27.
So we simply type 27 into the chemical mixing stations computer console and it will give us the created compound. Take the compound and place it onto the mixing station and it will give us our first compound, then repeat the process again and create the second compound and third if needed using the boards numbers for the ingredients we are adding and minusing O at each stage to create the next compound.
When successfully created we will be given the fully created compound.
Step 14 - Damn this things heavy
When you’re ready, have all the players interact with the nuke that is located in the garage to start up the final portion of the fight. A prompt will appear if not everyone is interacting with it. Keep interacting with it until all parts you collected earlier are added to the bomb and the compound. It will then start to charge up its teleporter, once it’s ready, the bomb will then start to glow and it will teleport you all down to the beach where you will see the Nuke on wheels.
As soon as you arrive, get those legs moving soldier and start pushing the nuke down to the water’s edge. Simply stand close to the Nuke and it will start to move. Look out for enemies and fireballs coming from the Radioactive thing and take evasive action when needed, the fire balls or Crog eggs it shoots into the sky can be shot down so don't panic when you see them hurtling towards you....its perfectly safe.....as long as your a good aim :). Take these out ASAP as there will be loads of Crogs as well as zombies chasing after whoever is pushing the bomb.
Step 15 - Knock Knock, special nuke delivery....sign here
When the nuke is at the water’s edge, it will launch itself like a fearless metal warrior into the water, which will annoy the hell out of the Radioactive Thing BIG TIME.
The Radioactive Thing will begin to attack even harder, and you’ll have to survive the onslaught of zombies, fireballs, and Crogs. You’ll notice there are DEATH RAYS around the corners of the cliffs in this area, you need to use the Death Rays to attack the Radioactive Thing’s chest.
Now and again you will notice the monster will reveal a tiny hit box on its chest which glows green. When it does, you need to hit it with the death ray in order to blow a hole in its chest each time it appears. You will know its working as the more you hurt him you will see radioactive blood spewing out of his chest and into the ocean.
When this happens he will start moving towards the beach to where the nuke launcher was, which is now empty. All players must run over to the nuke launcher and hold use on it to interact and you will see a nuke materialising back onto the launcher.
Step 16 - Radioactive Olympics?
Once the Radioactive Thing has been damaged enough, retreat back to the bridge and fight off the enemies until the beast begins shooting lasers once more and filling the beach up with acid spewing all over the place.
At this time, an obstacle course will be spawned, and players will need to jump, run, and slide their way down to the nuke and interact with it. Do not get hit by lasers or you will die. Get to the water’s edge and interact with the nuke to be teleported into the belly of the beast before the timer on screen runs out.
Step 18 - Explosive Nuclear Indigestion
Now all you need to do is input the code from the sheet in the safe. Each player gets three attempts to input the code, and you must all put it in correctly to launch it. When you’ve all inputted the code correctly, the bomb will go off, and you’ll have completed the Easter egg.
If you fail, you will be spat out and will have to repeat the obstacle course again and get down to the nuke to be teleported back inside the beast and give him repeated indigestion.
Still unsure? Check out Mr Darlek JD's video below for all Easter Egg Steps:
here is how to complete the awesome "Attack of the Radioactive Thing" zombies for Call Of Duty Infinite Warfare. It is a long winded one and its a bit tricky but it will be so worth it at the end, trust me. Its going to feel like a school lesson it involves maths, science and blowing stuff up with nukes.....who says maths and science couldn't be fun huh?
Lets get started this is gonna take a while :)
Step 1 - Who turned the lights out?
First we need to get the electrical juices flowing through this map and make it alive....aliiiiiveeee I tells you! This basically means we have toactivate the powerwhich in turn will allow us to grab Elvira’s spell book from the safe inside the Ice Cream Shop.
Here you will also find out how to Pack A Punch, this is required in order to progress to step 2 so its compulsory, and it will provide you with some additional kick ass weaponry to help with the end boss.
Step 2 - Where is Dr Frankenstein when you need him?
Next we need to build a Zombie Body in the spawn area, definitely makes a change from Build a Bear. This can be done by acquiring several different pieces from around the map. The locations of the body parts are shown below, make sure to wash your hands after picking these up ewww:
Head: Talk to Elvira, give her back the green vial she gave you filled up with radioactive zombie soldier souls killed with the meat cleaver. When she gets off her couch, lead her to the location where she generates a portal to Pack A Punch. Head to Pack-a-Punch and use the button on the wall to teleport back to the real world into an RV where you can get this part of the Zombie Body, which is just sitting on the window sill of the RV's front.
Torso: Get the Crowbar that you need to acquire the MAD Wonder Weapon. The crowbar is found in the pool area up one set of stairs right beside the BOMBSTOPPERS perk machine. Simply go up the stairs and into the back room where you will see the crow bar lying against the wall and pick it up. Then repair and activate the Deep Freeze Trap in the supermarket by heading over to the Garage Area and picking up the power box that was missing from it and place it back onto the wall where the sparking panel is. Once that is done, activate the trap to freeze the pig carcasses stored in there, then when finished, melee the pig in front of the zombie torso, and it will explode, giving you access to the torso itself. A "cool ice shattering" performance.
Left Arm: The left arm can be obtained from a fire pit in the RV Park. It is located just to the right of a Green lorry towing a caravan as shown in the picture above. Pick up that BBQ'd arm to acquire it.....damn these people must be hungry to eat a zombie arm, rather them than me :)
Right Arm: Build the Seismic Wave Generator, and then head to the beach where you found the Power Handle to turn on the power for this map and place the generator on the sand. The generator will pound the ground several times, causing the arm to lift back out of the ground little by little each time it thuds the ground, allowing you to obtain it.
Left Leg: learn how to get the awesome Cleaver melee weapon, and then use it to kill a Radioactive Zombie. This left leg will appear by cleaving the very first radioactive soldier zombie that appears in the game, so keep an eye out for that elusive left leg.....don't let it walk off on you.
Right Leg: Head over to the TV Studio near where Elvira is located and use a grenade to knock the leg hanging in the tree behind the studio down. How it got up there God knows. Blowing the tree up will allow you to grab the leg and add it to your collection. Now I know what its like for a chicken when it gets its leg removed.
Glass Shard: Head to the RV Park and melee the unbroken mirror in the bathroom using the Crowbar. This will give you the Glass Shard.
Car Mirror: You can get the Car Mirror off the white car in front of the gas station. Use the Crowbar to melee the passenger mirror and knock it off.
Hand Mirror: While Elvira is up and about getting exercise by mowing down zombie hordes, head over to the couch where she was lying down. You will notice she's not here, but she will have left behind a hand mirror, pick this up and your good to go. If she is sitting down summon her and lead here away from the studio and you will see the mirror.
When you have all of these pieces, make your way back to the main spawn where you will lay out the 3 mirror pieces around the hospital bed with the blood packages around it. One mirror goes on the brown wooden crates, the shard goes on the little table beside the bed with the blood packs and pills on it and the last piece goes to the right of the bed on top of the orange and green crates.
Then once these have been placed down, in the middle there is a raised bed in this room, place the zombie body parts onto them bed and you will see them all appear.
Step 3 - My card never got the Punchline
Now it’s time to move on to the next step. Head to the Ice Cream Shop and get the Scantron punch card which is sitting on a desk in the ice cream shop next to the Ghosts N Skull arcade machine. Once you have it, place it inside the machine at spawn and a series of nine numbers will flash across the screen. From here you need to simply try every combination you can until you get it. Keep in mind that the combination can only include the numbers 3, 4, 5, 6, and 8.
You will also notice yellow lights going from left to right, when you push one of the numbers, you will notice a red light appear in a specific location for this number. You need to line up with each correct button push and time it so that when you push the number and it glows red, the yellow lights is also on the red at the same time. It will take some trial and error so do not expect to get this first go, only Alan Turing could do this baby first time.
A single zombie hit while doing this process will throw you out of it and you need to enter it again.
Once you have got the first set of numbers, you can interact with the death ray to the right of the computer you input the code into. This will shoot the mini death ray at the zombie corpse on the bed and turn it into a real life zombie.
Step 4 - Anyone seen my Car keys?
After finding the number in Step 3, input it once more,this time backwards and activate the Death Ray for a second time. It will glow a different colour as it is now in transformation mode and when it hits the zombie tied to the bed, it seems to turn it into a set of Renault Laguna keys? I could swear these look like that kind of cars keys.... anyway what will really happen is the zombie inside will be killed, and it will drop a key for the player to pick up.
Pick this up and keep it close as we will be using it very shortly.
Step 5 - Nuclear Winter
Step five requires players to find the 3 parts needed to build the Nuke. I hope to build a nuke in real life is not this simple. Collect the parts as outline below.
The first part is found under the red car between the motel and the TV Studio underneath the RED CAR with green acid around it:
The second piece is found at the end of the stream that passed under the bridge:
The final piece can be obtained from the ground behind a fence gate outside of Elvira’s TV Studio.